Introduction
Who doesn’t love a dessert that’s simple, delicious, and endlessly customizable? The Oreo Dirt Cake is one of those desserts that has been passed down for generations and remains a crowd favorite at any gathering. It’s a no-bake treat that combines the rich flavors of crushed Oreos with a creamy filling, topped with more Oreos for that signature crunch. Whether you’re a seasoned baker or someone who prefers a simpler approach to dessert-making, this Oreo dirt cake recipe is a winner.
There’s something about the combination of Oreo cookies, pudding, and whipped cream that just hits the spot. Plus, it’s easy to prepare, making it a perfect go-to dessert for all your celebrations, parties, or casual get-togethers. Let’s dive into how you can make the perfect Oreo dirt cake, without all the hassle!
Oreo Dirt Cake recipe
Recipe Card
Recipe Name: Oreo Dirt Cake
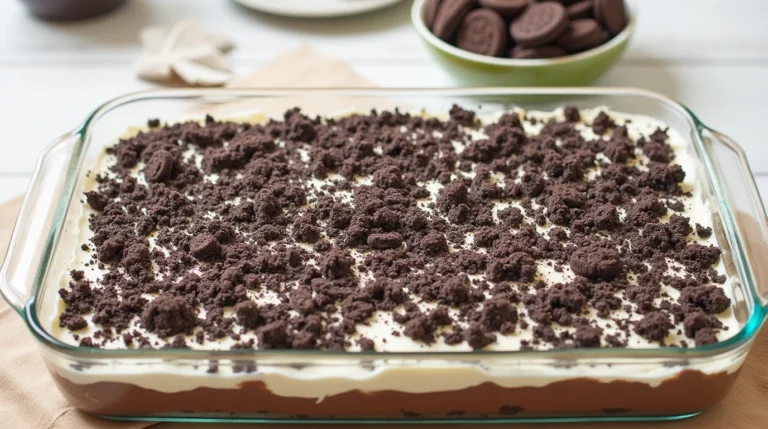
Description: A creamy, no-bake dessert made with layers of crushed Oreos, a smooth vanilla pudding mixture, and whipped topping. It’s the ultimate easy-to-make indulgence.
Prep Time: 20 minutes
Cook Time: 0 minutes
Total Time: 20 minutes
Servings: 8-10 servings
Calories: 450 per serving
Ingredients List:
- 1 package of Oreos (about 36 cookies)
- 8 oz cream cheese, softened
- 1/2 cup butter, softened
- 1 cup powdered sugar
- 3 1/2 cups whipped topping (like Cool Whip)
- 1 package of instant vanilla pudding mix (3.4 oz)
- 2 cups milk
Instructions:
- Crush the Oreos: Start by placing the Oreos in a plastic bag or using a food processor to crush them into fine crumbs. Set aside half of the crumbs for topping and use the rest as the base.
- Make the Cream Cheese Mixture: In a large bowl, beat the softened cream cheese, butter, and powdered sugar until smooth and fluffy.
- Prepare the Pudding Mixture: In a separate bowl, whisk together the vanilla pudding mix with 2 cups of cold milk until it thickens, about 2 minutes. Add the whipped topping and mix until fully combined.
- Assemble the Cake: In a 9×13-inch dish, layer the bottom with the crushed Oreos. Spread the pudding mixture on top and smooth it out.
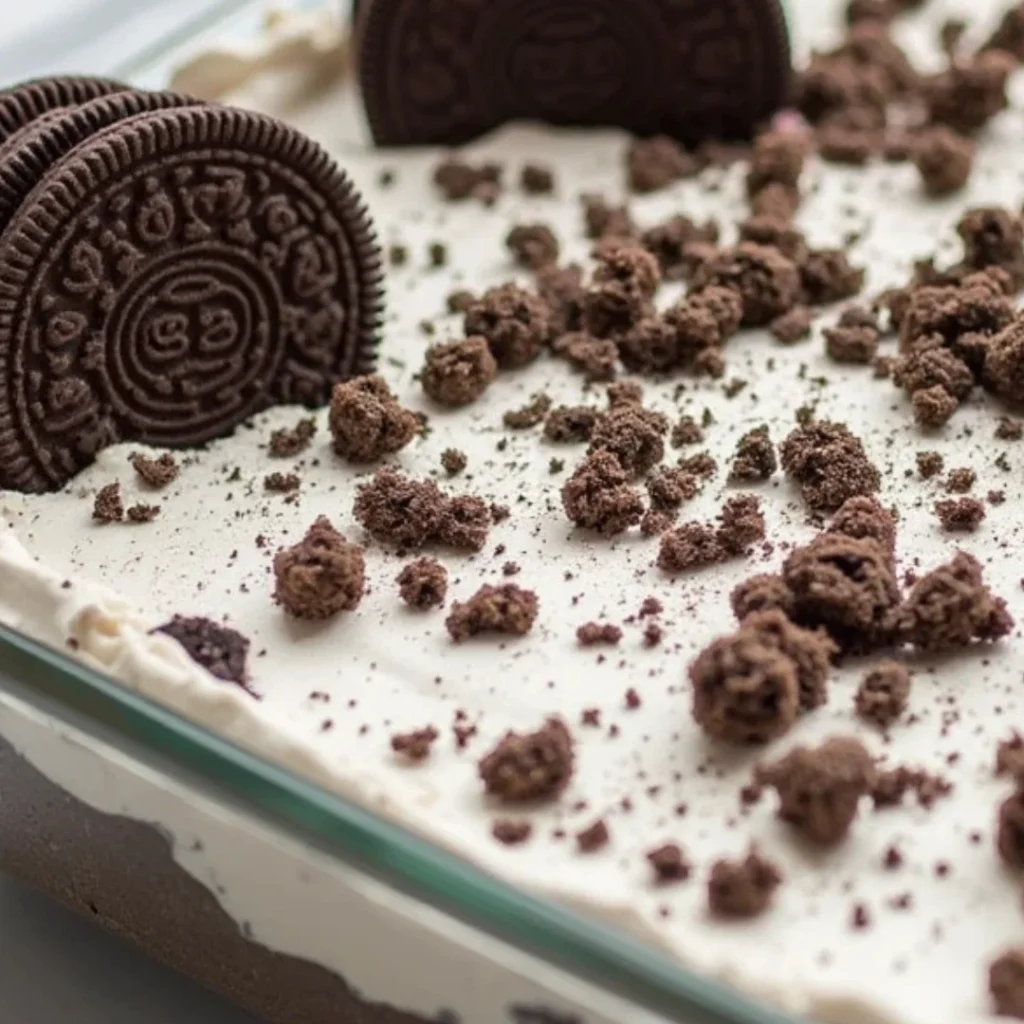
- Top with More Oreos: Sprinkle the remaining crushed Oreos on top of the dessert.
- Chill: Refrigerate for at least 3 hours to let the flavors meld and the cake firm up.
- Serve and Enjoy! Once chilled, cut into squares, serve, and enjoy this Oreo dirt cake treat!
Notes:
- For a stronger Oreo flavor, add more crushed Oreos to the top.
- You can use chocolate pudding instead of vanilla for a deeper flavor.
- Make sure to refrigerate long enough for the dessert to set properly.
Nutrition Information (per serving):
- Calories: 450
- Fat: 27g
- Carbs: 50g
- Protein: 4g
- Sugar: 35g
- Fiber: 2g
Why You’ll Love This Oreo Dirt Cake Recipe
If you’re looking for a no-fuss, delicious dessert that requires minimal effort, this Oreo Dirt Cake recipe is perfect for you. Here are a few reasons why this dessert is beloved by so many:
1. Quick and Easy to Make:
This Oreo dirt cake is incredibly simple to prepare, and you won’t need to turn on the oven. With only a few basic ingredients, you can have this dessert assembled in less than 30 minutes.
2. A Perfect No-Bake Treat:
If you’re looking for a dessert that’s easy to assemble without heating up your kitchen, this Oreo dirt cake is the way to go. It’s ideal for warm weather when you don’t want to use the oven.
3. Great for Any Occasion:
From birthday parties to BBQs or holiday celebrations, Oreo dirt cake is a guaranteed crowd-pleaser. It’s rich and indulgent, yet light enough for everyone to enjoy.
4. Customizable Flavors:
Want to switch things up? You can easily tweak this Oreo dirt cake recipe by adding different puddings, or even adding extra mix-ins like chocolate chips or fruit for added flavor.
Oreo Dirt Cake recipe ingredients and Substitutions
While this recipe calls for some basic ingredients, feel free to mix and match based on your preferences or dietary restrictions.
1. Oreos:
- Substitution: If you’re not a fan of regular Oreos, you can use Golden Oreos, Mint Oreos, or any other flavor that suits your taste.
- Allergen Note: For a nut-free version, check to ensure the Oreos you buy are certified nut-free.
2. Whipped Topping (Cool Whip):
- Substitution: For a homemade version, you can make your own whipped cream by whipping heavy cream with a little sugar until stiff peaks form. This will give the cake a fresh, creamy texture.
- Note: If you prefer dairy-free options, coconut whipped cream is a great alternative.
3. Cream Cheese:
- Substitution: If you’re avoiding dairy, use a non-dairy cream cheese alternative or silken tofu for a similar creamy consistency.
4. Instant Pudding Mix:
- Substitution: You can substitute vanilla pudding with chocolate pudding for a different flavor, or even try a butterscotch or cheesecake pudding mix for a unique twist.
How to Make Oreo Dirt Cake (Step-by-Step)
Follow these simple steps to create your own Oreo Dirt Cake, step-by-step.
Step 1: Crush the Oreos
Begin by crushing the Oreos. You can place them in a food processor and pulse until they turn into fine crumbs, or place the cookies in a large zip-lock bag and crush them using a rolling pin. If you’re feeling fancy, you can crush them in different sizes to add variety to the texture.
Step 2: Prepare the Cream Cheese Mixture
In a large mixing bowl, beat the softened cream cheese and butter together until smooth. Add in the powdered sugar, and beat until the mixture is fluffy and creamy. This mixture is going to provide the base for your dirt cake’s creamy filling, so be sure to mix it well.
Step 3: Make the Pudding Layer
In another bowl, combine the instant vanilla pudding mix with cold milk. Whisk it for 2 minutes until it thickens. Then, gently fold in the whipped topping until everything is fully combined. This creates the rich, creamy layer that will complement the crunchy Oreo crumbs.
Step 4: Layer the Cake
Now comes the fun part: layering the ingredients. Start by adding half of the crushed Oreos to the bottom of your 9×13-inch baking dish. Spread it out evenly. Then, layer the pudding mixture on top, smoothing it out to cover all of the crumbs. Sprinkle the remaining Oreo crumbs on top, covering the entire cake. This gives the cake that “dirt” look that everyone loves!
Step 5: Chill
Refrigerate the Oreo dirt cake for at least 3 hours, or preferably overnight. This allows the layers to set and ensures the dessert is cool and firm when served.
Expert Tips for Success Oreo Dirt Cake recipe
Even though this Oreo dirt cake recipe is simple, there are a few tips to ensure you get it right every time.
- Chill the Cake Long Enough: Make sure to refrigerate your Oreo dirt cake for at least 3 hours to allow the layers to set properly. You can even make it a day ahead of time to let the flavors develop further.
- Crush the Oreos Properly: Make sure to crush your Oreos into small, even crumbs to create a smooth texture. Larger chunks can disrupt the consistency of the dessert.
- Use Room Temperature Cream Cheese: For a smoother consistency, make sure your cream cheese and butter are softened to room temperature before mixing.
- Don’t Skimp on the Whipped Topping: The whipped topping gives this dessert its signature light and creamy texture. Make sure you’re using enough to balance the richness of the cream cheese mixture.
Variations and Customizations for Oreo Dirt Cake recipe
Oreo dirt cake is a versatile recipe, and there are so many ways to customize it to fit your preferences:
- Flavor Twists: Replace the vanilla pudding with chocolate, butterscotch, or even cheesecake-flavored pudding for a fun twist on this classic.
- Add-ins: Mix in chocolate chips, mini marshmallows, or even chopped fruit like strawberries or bananas for a personalized touch.
- Layer with Fruit: You can alternate the Oreo crumbs and pudding layers with slices of fruit to add a refreshing contrast to the richness of the dessert.
Storage and Reheating Instructions Oreo Dirt Cake recipe
Store your Oreo dirt cake in the fridge in an airtight container to keep it fresh. It will stay good for 3-4 days, though it’s best enjoyed within the first 2-3 days. There’s no need to reheat this dessert; simply remove it from the fridge when you’re ready to serve.
Serving Suggestions Oreo Dirt Cake recipe
While the Oreo dirt cake is amazing on its own, here are a few ideas for serving it:
- Pair with Fresh Fruit: Serve with a side of berries or other fresh fruit for a refreshing contrast.
- Top with Ice Cream: For the ultimate indulgence, add a scoop of vanilla or chocolate ice cream on top of your dirt cake.
- Serve with Whipped Cream: Top each serving with extra whipped cream or even a drizzle of chocolate syrup for added decadence.
Frequently Asked Questions (FAQs) about Oreo Dirt Cake recipe
Q: Can I make Oreo dirt cake ahead of time?
A: Yes! In fact, making it ahead of time is ideal because it allows the flavors to set and the dessert to firm up. Let it chill overnight for the best results.
Q: Can I use a different type of cookie instead of Oreos?
A: Yes, you can use other cookies like Nilla wafers, chocolate chip cookies, or even peanut butter cookies for a unique flavor.
Q: Can I make this dessert in individual servings?
A: Yes! You can layer the ingredients in mason jars or dessert cups for individual portions, perfect for parties or gatherings.
Related Recipes
If you love this Oreo dirt cake, here are a few more dessert recipes you might enjoy:
- Chocolate Pudding Pie: A rich, chocolatey no-bake dessert with a buttery crust.
- No-Bake Cheesecake: A creamy, tangy dessert that’s easy to make and perfect for any occasion.
- Banoffee Pie: A delicious pie made with bananas, toffee, and whipped cream, all on a buttery biscuit base.
Conclusion
This Oreo dirt cake recipe is an easy, no-bake dessert that’s perfect for any occasion. With its creamy filling, crunchy Oreo topping, and simple preparation, it’s a dessert everyone will love. Whether you’re a beginner or a seasoned baker, this Oreo dirt cake will quickly become a favorite in your recipe collection. Give it a try and experience the magic of this delicious treat!