
Introduction
If you’ve ever tasted a Japanese Cheesecake recipe , you know it’s a dessert unlike any other. This fluffy, melt-in-your-mouth treat combines the richness of traditional cheesecake with the light, airy texture of a sponge cake. In this Japanese Cheesecake recipe, we’ll guide you step-by-step to create this light and delicious dessert that’s perfect for any occasion. Whether you’re new to baking or a seasoned pro, this recipe is easy to follow and yields amazing results every time
This unique cheesecake has gained popularity worldwide, thanks to its incredibly fluffy texture, which comes from the addition of whipped egg whites. Whether you’re a baking pro or a novice, this Japanese Cheesecake recipe is surprisingly simple to make and delivers amazing results. So, if you’ve ever wondered how to recreate this delicious, airy dessert in your own kitchen, you’re in the right place!
Recipe Card
Recipe Name: Japanese Cheesecake
Description: A light and fluffy Japanese Cheesecake that combines the best qualities of cheesecake and sponge cake. This easy-to-make recipe will leave you with a soft, melt-in-your-mouth treat that’s perfect for any occasion.
Prep Time: 25 minutes
Cook Time: 1 hour 10 minutes
Total Time: 1 hour 35 minutes
Servings: 8-10 servings
Calories: 250 per slice
Ingredients:
- 8 oz (225g) cream cheese, softened
- 1/2 cup (120ml) whole milk
- 1/4 cup (60g) unsalted butter
- 1 tsp vanilla extract
- 5 large eggs, separated
- 1 cup (120g) granulated sugar
- 1/2 cup (60g) all-purpose flour
- 1/4 cup (30g) cornstarch
- 1/4 tsp cream of tartar
- A pinch of salt
- Powdered sugar (for dusting)
Instructions:
- Preheat the Oven: Preheat your oven to 320°F (160°C). Line the bottom and sides of a 9-inch round cake pan with parchment paper.
- Prepare the Cream Cheese Mixture: In a medium saucepan over low heat, combine the cream cheese, milk, and butter. Stir continuously until everything is melted and smooth. Remove from heat and stir in vanilla extract.
- Mix Dry Ingredients: In a separate bowl, sift together the flour and cornstarch. Gradually fold the sifted dry ingredients into the cream cheese mixture, mixing well until smooth.
- Separate the Eggs: In two separate bowls, separate the egg whites from the yolks. Whisk the egg yolks into the cream cheese mixture until fully combined.
- Whip the Egg Whites: In a large bowl, beat the egg whites with a pinch of salt and cream of tartar until soft peaks form. Gradually add in the sugar and continue beating until stiff peaks form.
- Combine the Mixtures: Gently fold the whipped egg whites into the cream cheese mixture in batches, being careful not to deflate the batter.
- Bake: Pour the batter into the prepared cake pan and tap the pan lightly on the counter to release any air bubbles. Place the pan in a water bath (a larger pan filled with hot water) and bake for 1 hour and 10 minutes, or until the cake is set and lightly golden on top.
- Cool: Allow the cake to cool in the oven with the door slightly ajar for 1 hour. Then, remove it from the oven and cool completely before removing it from the pan.
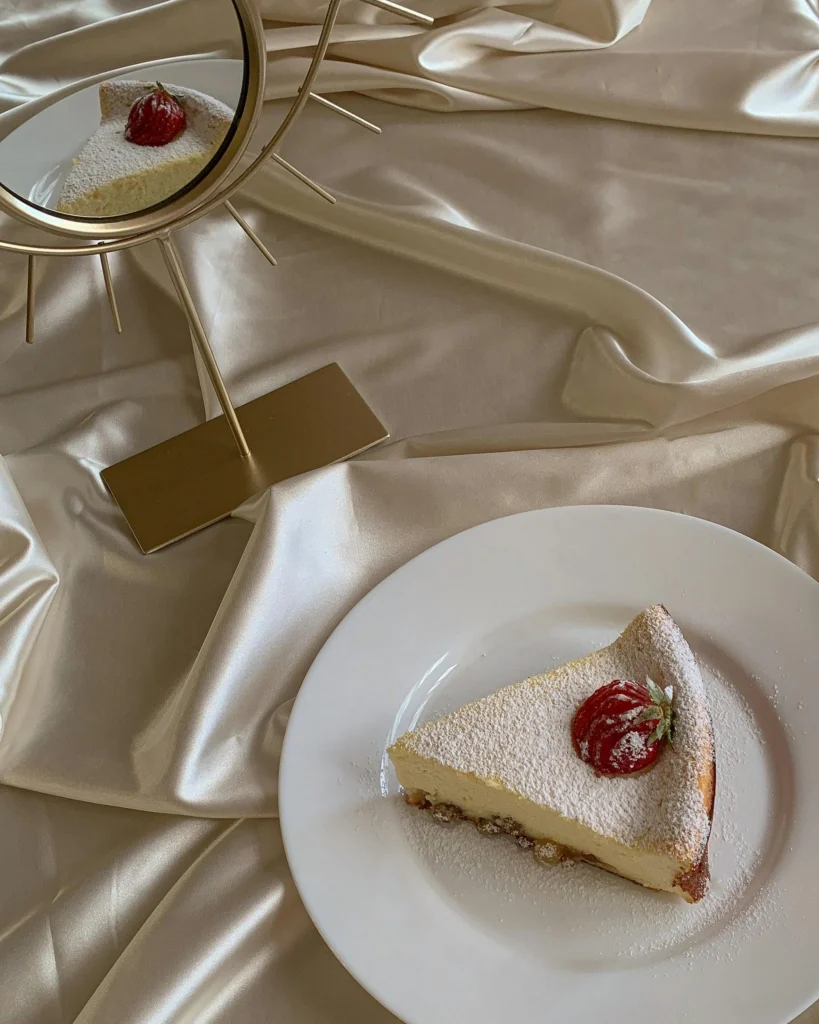
- Dust and Serve: Dust the top of the cheesecake with powdered sugar before serving.
Why You’ll Love This Japanese Cheesecake Recipe
- Fluffy Texture: The magic of Japanese Cheesecake lies in its incredibly light and airy texture. With the whipped egg whites, this cheesecake practically melts in your mouth.
- Easy to Make: Despite the delicate nature of this dessert, this recipe is surprisingly easy to follow. The ingredients are simple, and the steps are straightforward.
- Best of Both Worlds: This cheesecake is a beautiful blend of a traditional cheesecake and a fluffy sponge cake. The result? A light, creamy dessert that’s perfect for any occasion.
- Customizable: You can add your own twist to this recipe with different flavorings or toppings, such as fruit, chocolate, or a fruit compote.
- Perfect for Entertaining: This show-stopping dessert is sure to impress guests at any party or family gathering. It’s elegant, delicious, and easy to make in advance.
Key Ingredients for the Perfect Japanese Cheesecake recipe
- Cream Cheese: Cream cheese is the key ingredient that gives this cheesecake its rich, tangy flavor. For a lighter version, you can try using reduced-fat cream cheese.
- Butter: Unsalted butter is used to add richness and smoothness to the batter. You can substitute with margarine if needed.
- Eggs: Eggs provide structure and moisture. Be sure to separate the yolks and whites for the best texture.
- Milk: Whole milk helps keep the cheesecake creamy. You can substitute with almond milk or another dairy-free alternative for a dairy-free version.
- Cornstarch: This ingredient helps to set the cake and contribute to its light texture. You can use arrowroot powder as a substitute.
How to Make Japanese Cheesecake recipe: Step-by-Step Instructions
Step 2: Melt the Cream Cheese, Butter, and Milk
In a saucepan over low heat, combine the cream cheese, milk, and butter. Stir occasionally to avoid burning the mixture, and continue until everything is fully melted and smooth. Remove from the heat and stir in the vanilla extract for flavor.
Step 3: Sift and Mix Dry Ingredients
In a separate bowl, sift the flour and cornstarch. Slowly add these dry ingredients to the cream cheese mixture, stirring to combine. Be sure to mix until the batter is completely smooth.
Step 4: Whisk the Egg Yolks and Fold Into the Mixture
In a separate bowl, whisk the egg yolks, then fold them into the cream cheese mixture. This step is key to incorporating the eggs smoothly without deflating the batter.
Step 5: Whip the Egg Whites
In a clean bowl, beat the egg whites with a pinch of salt and cream of tartar until soft peaks form. Slowly add the sugar and continue to beat until stiff peaks form. This step is crucial to getting the fluffy texture.
Step 6: Fold the Egg Whites Into the Batter
Carefully fold the whipped egg whites into the cream cheese batter in batches. Be gentle during this step to maintain the fluffiness of the mixture.
Step 7: Bake in a Water Bath
Pour the batter into your prepared pan and smooth the top. Place the pan into a larger pan filled with hot water (creating a water bath) and bake for 1 hour and 10 minutes. Check for doneness by lightly tapping the pan—if the cheesecake jiggles slightly but is set, it’s ready.
Step 8: Cooling Time
After baking, let the cheesecake cool in the oven with the door slightly ajar for 1 hour. Then remove it and let it cool completely before removing it from the pan.
Step 9: Serve and Enjoy!
Before serving, dust the top of the cheesecake with powdered sugar for a beautiful finishing touch. Slice and enjoy the light, fluffy goodness!
Step 1: Preheat the Oven and Prepare Your Pan
Start by preheating your oven to 320°F (160°C). Grease and line a 9-inch round cake pan with parchment paper, making sure the paper comes up the sides of the pan.
Expert Tips for Baking the Best Japanese Cheesecake recipe
- Room Temperature Ingredients: Ensure your cream cheese and butter are softened to room temperature before you start. This helps the ingredients blend more easily and prevents lumps.
- Whip Egg Whites Correctly: The key to a fluffy texture is perfectly whipped egg whites. Don’t overbeat them—stop when they form stiff peaks but aren’t dry.
- Water Bath: Baking your cheesecake in a water bath ensures an even bake and prevents cracking. It also contributes to the creamy texture.
- Cooling Process: Letting the cheesecake cool slowly in the oven helps prevent it from sinking in the middle. Avoid moving it around too much before it’s fully set.
Variations of Japanese Cheesecake recipe to Try
- Fruit Toppings: Add fresh berries, a drizzle of fruit syrup, or even a caramel topping to customize the flavor.
- Chocolate Twist: For a chocolate-flavored cheesecake, add a little cocoa powder to the batter or swirl in melted chocolate.
- Vegan Version: For a vegan Japanese cheesecake, substitute the cream cheese with vegan cream cheese and the eggs with aquafaba (chickpea brine).
How to Store and Reheat Your Japanese Cheesecake recipe
- Storage: Store any leftover Japanese Cheesecake in an airtight container in the refrigerator for up to 3-4 days.
- Freezing: If you want to keep your cheesecake longer, it can be frozen for up to 2 months. Allow it to thaw in the fridge overnight before serving.
Serving Suggestions for Japanese Cheesecake recipe
Serve your Japanese Cheesecake recipe on its own or with a side of fresh whipped cream, seasonal fruits, or a drizzle of berry compote. It pairs wonderfully with a cup of tea or coffee.
Frequently Asked Questions (FAQs)
How to make Japanese Cheesecake without it sinking?
Be sure to cool the cheesecake gradually and avoid moving it too much. A slow cooling process in the oven helps prevent sinking.
Can I make this cheesecake ahead of time?
Yes! Japanese Cheesecake can be made up to 2 days in advance. Just store it in the refrigerator and dust with powdered sugar before serving.
Related Recipes
- Matcha Cheesecake – A twist on traditional cheesecake, flavored with Japanese green tea powder.
- Classic New York Cheesecake – A rich and creamy cheesecake with a graham cracker crust.
- Japanese Cotton Cheesecake – A lighter, airier version with a delicate texture, similar to this recipe.
Conclusion
This Japanese Cheesecake recipe is truly a showstopper. With its light, airy texture and creamy flavor, it’s a dessert that’s sure to impress any guest. Whether you’re an experienced baker or just starting out, this recipe will guide you every step of the way. Don’t hesitate—give it a try and enjoy the fluffy goodness of homemade Japanese Cheesecake today!